Fundamentals of Model Airplane Building A Complete Course for Beginners Who By EDWIN T. HAMILTON IN THIS article, we present the third and last "all balsa" glider which will appear in this course. It Is a contest glider designed and perfected by your editor, Charles H. Grant. As this completes such instruction as will be given on this type of model, it may be helpful to quickly review the work covered so far. In the opening article, an all balsa, stick glider of straight lines was given for obvious reasons. Its simplicity of line, together with its gliding ability, made it a perfect model through which to introduce the newcomer to the fun of model airplane building. In this first article, such steps as layingout, cutting, sandpapering, cementing, general assembly and the reading of simple plans were covered. So much for stick, all-balsa gliders. In the second article appearing last month, refinements were introduce into the glider design. A nacelle was added to the stick, squared corners were gracefully rounded, while the wing was given a dihedral angle. The cutting of curved sections, cementing the wing in dihedral position, reading and using graph plans, and shaping the nacelle were only a few of the advanced steps covered. So we now come to the contest - and last all-balsa - glider. Through it is brought to the reader his first fuselage, his first sweepback and tapered wing and a stationary tail unit, together with the art of launching a contest glider. At the same time, we introduce another addition to these articles. This will be an exhaustive, comprehensive and complete model airplane glossary of terms. This feature will appear at the end of each article. It will consist of understandable definitions of all aeronautical or model words used in the article it covers, In this way, the new builder will soon have a model airplane and aeronautical vocabulary second to none. Fuselage Turn to the plan and carefully study the fuselage, as shown under "Side View" and "Plan," In the former view, the side of the fuselage is shown, while a top view is seen under the latter. Obtain a piece of light balsa wood measuring at least 1/4" thick 2-1/4" wide and 14-1/4/" long. This piece will allow a 1/4" surplus for waste on the width and length. Study the graph plan shown just above the fuselage. Rule a sheet of paper with 1/4" squares, and then make a full-size copy of the front part of the fuselage on it, As this must be done free-hand, the squares are given to aid in the work. When copying the plan, make sure that the line you are drawing on your ruled paper passes through each square in exactly the same location as the corresponding line passes through the squares of the graph plan. Take the piece of balsa and sandpaper one edge perfectly straight and parallel with the grain of the wood. This is called a "working edge" and in this case will become the top of the fuselage. Lay a piece of carbon paper on the wood with the full-size copy over it. Bring the straight top edge of the pattern flush with the straight edge of the wood and at the same time, see that the nose of the pattern is within 1/8" of the edge of the piece of wood. When in this position, trace over the lines of the pattern with a sharp pencil. Remove the pattern and go over the lines with the pencil to make them stand out clearly. Do not press too hard with the pencil as the wood may become marred should the pencil slip. Measure 3/16" down from the straight edge of the wood and draw a line along its length. If the tracing has been correctly made, this line will meet the upper right end of the pattern outline, Measure along this top line 7" from the end of the pattern line, which will be the trailing, or rear end of the fuselage, This line is the straight upper edge of the fuselage. The bottom edge extends from the lower end of the pattern line out to a point 1/16" under the end point of the fuselage. When these lines have been drawn, the fuselage is cut out in the usual manner. For instructions on this work, see June issue, page 9, Fig, 1. Both sides of this fuselage piece should he carefully sandpapered smooth and all edges rounded except those holding the wing and elevator. These must be left perfectly flat. Note their position in the side view under "Wing Position" and "Elevator." We are now ready to cut, shape and sand the elevator. Elevator The elevator is shaped from a piece of light sheet balsa wood measuring 1/16" thick, 2-1/2" wide and 7" long, as shown by the dotted lines in the plan under "Elevator." Sandpaper one edge straight to serve as the working edge. Sandpaper the opposite edge parallel with the first. Find the exact center of the wood by measuring 3-1/2" from either end and draw a line at right angles to the long side edges. Square up both ends. See that they form right angles with the side edges. Measure 1-1/2" from one side edge at both ends and draw lines from these points to a center point on the opposite side edge. Cut the elevator to the shape shown in the plan with 7/8" radius ends, Complete it by sandpapering both sides and slightly rounding all edges. Rudder This requires a piece of light sheet balsa measuring 1/16" thick, 2-1/2" wide and 3-1/2" long. A back or trailing edge of the rudder and one end are sandpapered smooth, straight and at right angles to each other. The opposite end is rounded with a 7/8" radius circle, as shown in the "Side View" under "Rudder" of the plans. Shape the rudder, as was done with the elevator, slightly round all edges except the straight end, and then sand both sides smooth.
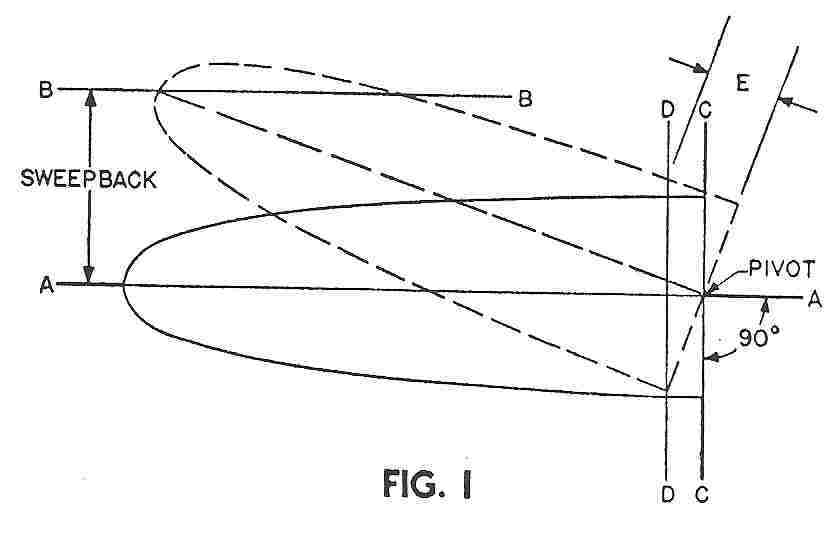
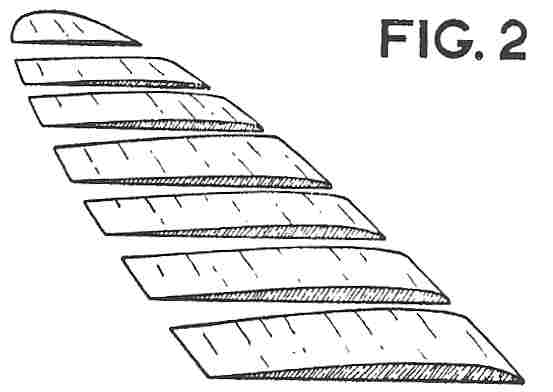
Wing The wing used on this glider tapers in width and thickness from its center toward its tips. It is made in two duplicate parts. To simplify the work of the builder, instead of giving a dimension for its sweepback, half the wing is shown on a graph, which includes the necessary slant for the sweepback. A full-size copy of the graph plan is drawn on paper ruled with 1/4" squares, as shown in the plan under "Wing." The two halves are cut from a piece of very light balsa measuring 1/8" thick, 3" wide and 16-1/2" long. The longest edge of a sweepback wing is always the leading edge. It will be noted that while this edge on each half is nearly 8-3/4" long, the sheet balsa piece from which both halves are cut need be only 16-1/2" long. This is because of the slant of the inner straight end of each half, which forms the center dividing line of the wing, Place a piece of carbon paper on the balsa sheet with the pattern of the wing half over it. See that the wing tip of the pattern is at the end of the wood when making the tracing. The second half is now traced by turning the pattern around until the short or trailing edge, of the wing half just traced, continues into the long edge of the wing on the pattern. At the same time, the leading edge of the traced wing must continue into the trailing edge of the wing on the pattern. The straight inner end of the pattern wing must be directly over the inner end of the tracing, This process is quite correct when the slant of the inner end is given, as in this case, but when only a dimension is given, another method must be used. For example, let us say that the wing has a 2" sweepback. Half of the wing is cut out, as in Fig. 1. As no slant has been specified for the inner end of the wing, this must he cut square or at right angles to a line drawn through the center of the half wing along its length. Let us say that the half wing is 3" wide and 9" long, Measuring 1-1/2" from either edge at the inner end or center of the entire wing, make a mark. Slide your rule to a point further toward the tip, find the exact center and mark. Draw a line through these two marks, which will split the wing along its center. Draw a straight line on a piece of paper at least 10" long, as shown in Fig. 1 by "A-A." Draw another straight line at right angles to line "A-A" and passing through it, as shown by "C-C" line, The line "B-B" is drawn 2" above "A-A" and parallel to it, which represents the called for sweepback of the wing. Place the wing half on line "A-A" so that the line drawn along its length is directly over the line "A-A," as shown by the solid lines of the illustration. At the same time, see that the inner straight end of the wing half is directly over line "C-C." At the point where "A-A" and "C-C" cross, the wing half is pivoted until the end of its center line touches line "B-B". When in this position, as shown by the dotted lines in the illustration, the line "D-D" is drawn. This must be parallel to "C-C" and pass through the corner formed by the inner end of the leading edge and the straight inner end of the wing half. The wing must be cut along this line to form the proper slant for a 2" sweepback. In other words, the distance "E" is removed from the trailing edge, shorter than the leading edge by the distance "E." In our model here, the distance "E" equals 1-1/16", as shown in the graph plan. The two wing halves are now cut out in the usual manner. The sweepback and taper along the width of the wing has been taken care of through this layout and cutting. The taper in thickness must now be dealt with. This is shown in Fig. 2. The form of the wing is shown in the plans under "Wing Section." Sandpaper must be used to gain this form. Fig. 2 shows several sections of the wing, cut as crosssections, to enable the reader to picture how his wing should be formed, Note that the thickness of each half slowly decreases as it nears the tip. When doing this work, start sanding at the inner end of each half and work out toward the tip. When completed, the two halves are cemented together with a 2-1/4" dihedral, as was explained in the June issue, Page 9, (see Fig, 3). When making this joint, lift one tip 4-1/2" off level, while the other is held at level. Assembly Cement the elevator in position on the fuselage, as shown in the "Plan View" of the plans. See that its top is at right angles to the side of the fuselage and its trailing edge is at right angles to the edge of the fuselage. Directly in the center of the elevator and over the center of the top of the fuselage, cement the rudder. Be sure it forms right angles with the elevator. Its sides must be parallel with the sides of the fuselage. The wing is cemented on the fuselage, as shown in the plans. The top of the fuselage, where the wing is located, must be cut in the form of a slight groove to fit the form of the wing at its center. This was shown in detail last month. Turn to the June issue, Page 10, which shows the plans, Note "Section A-A" of the plans, which shows how the nacelle is cut in the form of a shallow "V" to accommodate the wing. The top section of the fuselage of this glider is cut in the same manner, The proper position of the wing is shown under "Wing Position" in the plans, (see "Side View" and "Plan"). The leading edge of the wing at its center protrudes over the level top of the fuselage a distance of 1/4", which makes the trailing edge come to within 1/16" of the rear of this section. When cementing the wing in place, see that both wing tips are level with each other and an equal distance above the level on which the fuselage rests, when the fuselage is perpendicular to that level, Go over the entire model with sandpaper. Sand lightly to remove excess glue. The nose of the fuselage is now weighted to obtain the correct center of gravity location. Note that this is given in the "Side View" of the plans and is indicated by the letters "C.G." Balance the model at this point, as explained in the June issue on Page 42, with an illustration on Page 9, under Fig, 4. Small brads are thrust into the nose of the fuselage until enough weight has been added to balance the glider at the point indicated by "C.G," This is shown in the side view of the plans.
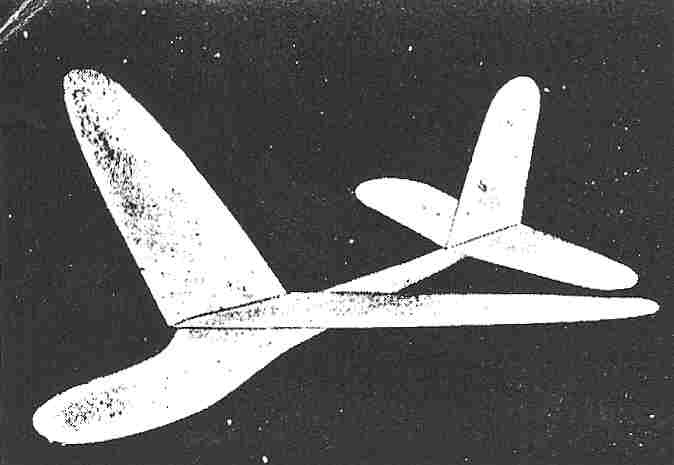
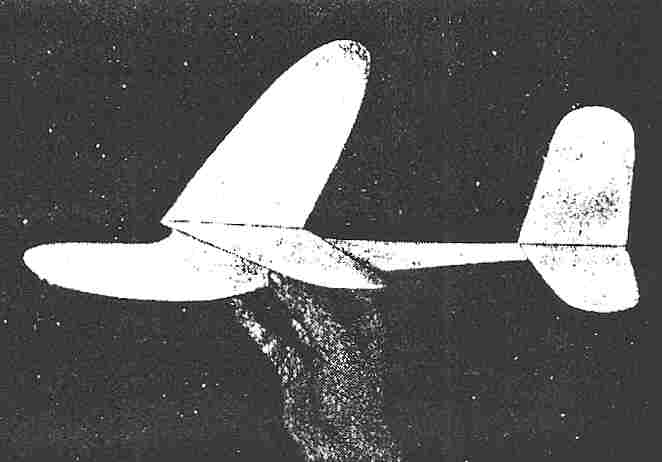
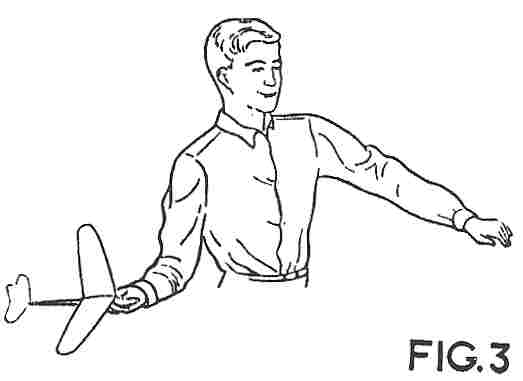
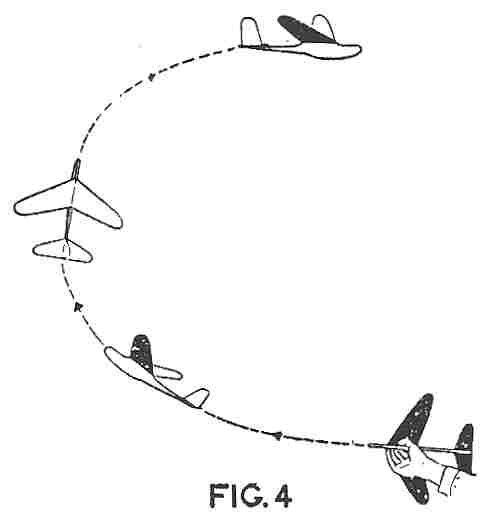
Launching In Fig. 3 will be seen an illustration of the correct method of holding a contest glider for launching. The arm is brought well back, swept forward, and the glider released with its nose pointing slightly up and its wing in a vertical bank position. In Fig. 4 the result may be seen. When the glider leaves the hand, it shoots up and out: the upward flight due to the position of its thrust, while the outward circle is the result of the vertical bank position of its wings, which naturally turn it toward the right. As the model climbs, It slowly rights itself in the air and its soaring flight starts. It may continue to glide in wide circles, which is desirable, or air currents may carry it into other flight courses. The beginner should realize that such launching is not easy and that considerable time and practice must be given the side arm launching before the new enthusiast will master it, but experts agree that it is far best, so keep at until you yourself can get the most from your glider by this method. Glossary of Terms BALSA. The lightest wood that grows and widely used in model airplane work. DIHEDRAL ANGLE. In model airplane construction and designing, refers to the height above center of the wing that the wing tips are set, (Aviation) This is obtained by inclining the main wings of an airplane up from the center of the fuselage so that the tips are higher than any other portion of the wings. This angle is measured from the chord of the wing to a line drawn perpendicular at the intersection of the two wings, if they were elongated equally at the fuselage until they met. ELEVATOR. A hinged or pivoted auxiliary, horizontal surface or wing which controls the up-and-down direction of the airplane. It is part of the tail unit or assembly. FUSELAGE. Body. That portion of an airplane to which the wings, tail unit and landing gear are attached. It is streamlined and it contains the power plant, cockpit or cabin for passengers and pilot, cargo, gasoline, etc. GLIDER. A light, motorless form of aircraft similar to the airplane. One who glides. LEADING EDGE. The edge that leads. The foremost, or front edge of a wing or a propeller. That part of a wing, elevator, fin or rudder which leads all other parts of the structure to which it is attached. NACELLE. An enclosure designed to accommodate the passengers or power plant, or both, Usually limited to the pusher type of aircraft, it is shorter than the average fuselage and larger than the average cockpit. When used in reference to balloons, it indicates the passenger basket suspended from the gas bag. RUDDER. A hinged or pivoted, movable, vertical auxiliary airfoil or surface, designed to steer an aircraft about its vertical axis. A flat or vertical wing, situated on the stern of aircraft, which controls the left to right movement horizontally. SWEEPBACK. The acute angle between the lateral axis of an airplane and the projection of the axis of the wing on the plane which includes the lateral and longitudinal axes. (Note: The axis of a wing is a line through the centroids of the section of the wing). TAIL UNIT. The rear portion of an aircraft which includes the rudder, elevators, fin and stabilizers. TRAILING EDGE. The edge that trails. That part of a wing, elevator, fin or rudder which trails all other parts of the structure to which it is attached. WING. A general term used to express the main supporting surface of an airplane. Usually designated as the right, left, upper or lower wing. Scanned From July, 1934 |
