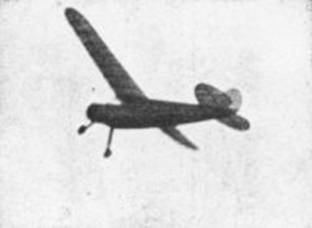
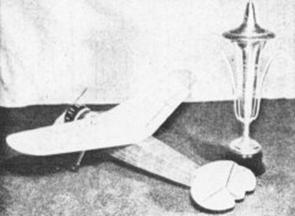
NOW that the flying scale model is part of all major contests, the main question is: which one to build? The answer to this question during the Scripps-Howard National Contest in Akron last year proved to be the Cessna C-34. It took first place in the eliminations in Cleveland, with a flight of one minute, and also took first place in the finals in Akron with a flight of two minutes, five seconds. The winning flight was made in a strong breeze covering over half a mile before it disappeared behind a small woods. The points given for first place in this event were just enough to help tie as high point man and gain partial possession of the Al Williams Trophy.
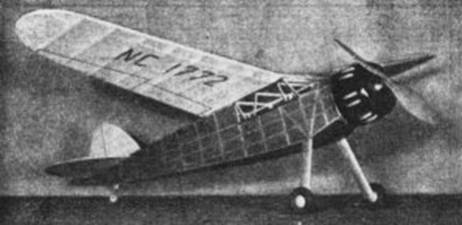
This is how your model should look when it is finished
|
|
|
Fuselage
The fuselage is built up of 3/32" square hard balsa, the two sides being laid out and joined together the same as a regular fuselage model. The cowling is built next and is covered with 1/16" medium balsa. Two tappet covers are glued on over each cylinder. The size of the cowling may be obtained from the top and side view drawings. Make the seven cylinder motor as complete as possible to help gain points in contests. After the motor and cowling are finished glue them to the fuselage and add the stringers as shown. Drill a hole through the landing gear block on the bottom of the fuselage and slide the bamboo strut through, gluing it to the block and also to the cross brace in the body. Then using a plastic wood made of cement and sawdust, form a fillet where the landing gear joins the body. Airwheels are held on the axle with a drop of cement.
The wire tail wheel strut is cemented to a balsa plate which is fitted inside the last upright on the body. The body is covered with small strips of paper from the cowl to the landing gear only. From there back it may be covered with one piece of paper to each side. After spraying with water no wrinkles will appear. Next put on the side windows, using dope instead of cement to avoid wrinkling the celluloid. The windshield is not fitted on until the wing has been glued to the fuselage. All longerons and uprights showing through the windows should be covered with 3/32" strips o f black paper.
Wing
Lay out the entire wing, minus the spars, and allow to dry completely. After putting in the center section spars, crack the leading edge and put blocks under the tips for dihedral. Glue in the top spars and allow to dry, then turn over and glue in the bottom spars. Sand off bumps on ribs between spars from the last spar to the leading edge as this will eliminate unsightly bumps on the wing after covering. Cover wing and spray with water. When dry give it two coats of thin clear dope. Then put on the license numbers and cement the wing in place on body. The correct place is given on the plans. Landing flaps and ailerons are indicated by 1/16" strips of black paper.
Tail
Make the stabilizer outline of 3/32" by 3/16" balsa, with one 1/8" spar running across. Bend 1/16" square strips across to form a streamline section. Cover the stabilizer with paper, grain running the same way as the ribs, but do not cover the bottom center section of the stabilizer as this part fits into a slot on the fuselage. Indicate elevators with a 1/16" strip of black paper.
Make the rudder the same as the stabilizer, with the exception of the bottom rib which is made of 1/16" by 3/16" balsa.
Propeller
The propeller is carved from a block 1-1/4" by 1-3/4" by 11 inches. Leave the hub 1/4" thick, taper the blades 3/16" at the hub to 1/16" at the tip of the blade. Give it five or six coats of dope, sanding it between coats. Cement the free-wheeling on firmly, and paint the propeller silver. The propeller shaft is made of 1/16" music wire.
Flying
Make an eight strand motor of 1/8" rubber 50 inches long, wiping it free of all dust and grit and lubricating well. Tie a weight on a long piece of string and drop through the nose of fuselage over the rear hook and back out of the nose. Pull the motor through fuselage, forming a 16 strand motor, 25 inches long. Since the model is naturally tail‑heavy, add weight inside of the cowling until the model glides evenly. By adding the correct amount of down‑ and side-thrust the model can he made to climb almost vertical, attaining several hundred feet altitude before the free wheeling "kicks in." The flying weight is 4-1/2 ounces.