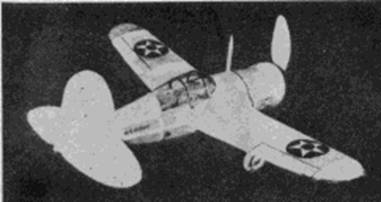
 Simple to build, yet very realistic |
 A large prop and clean lines insure fine flights |
The Plan Page
[ Home ] [ Previous Plan Pages ]
[ Special Things ] [ Earl Stahl Plans ]
gt-hunter1@home.com
Simple to build, yet very realistic |
A large prop and clean lines insure fine flights |
BREWSTER FIGHTER
By HERBERT K. WEISS
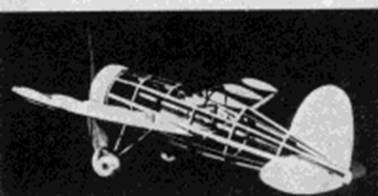 The fuselage frame is easy to build |
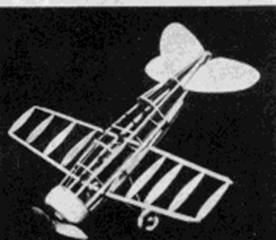 Simple construction graces the wing and tail |
A SLEEK navy fighter is the Brewster XF2A-1, a thick‑bodied, mid‑wing fighter of the Gee Bee school of design.
Your fleet of models would not be complete without a flying replica of this remarkable stubby battler. Here's how you can build one in a very short time. If you have not built many flying scale models before, this is a very good one with which to begin.
The model has been somewhat simplified in the interests of flying ability, but still retains all the characteristic features of the real ship.
Wing
Begin with the wing which is made in one piece. Cut out two of each size ribs from 1/32" sheet balsa and assemble the wing over the plan. To make the left half, simply pin a piece of blank paper at the lower margin of the plan and draw in the left panel with the aid of a ruler, so that you will have a layout for the whole wing. Cut the leading and trailing edges to shape after the cement has dried and add the bamboo wing tips. Crack the spars just outside rib 1 and then re-cement them to give the wing the correct mount of dihedral.
Fuselage
Cut out two halves of each fuselage bulkhead from 1/16" sheet balsa and cement the halves together. Cement bulkheads B and C to the wing, center section as shown on the plan. Add the two main 1/16" x 1/8" side stringers, and cement bulkheads A, E and F to these. Top and bottom stringer of 1/16" square balsa are now put in place, and finally the thin 1/32" square bamboo stringers which absorb the stresses of head - on impacts.
Now bend the cockpit frames from 1/32" square bamboo. The plan shows the correct number, but for such a small flying model the builder will probably prefer to simplify the arrangement as shown in the pictures of the test model.
Cowl
The cowl may be made in a number of ways. The method shown on the plan of assembling it from circular rings cut from 1/8" sheet balsa is probably the simplest. Hollow out the inside further after the rings have been cemented together, and sand the outside smooth.
Tail Surfaces
Trace the outline of the tail surfaces on 1/32" sheet balsa and cut them out with a sharp razor. Sand smooth on both sides and add the stiffeners to the stabilizer. Cement the stabilizer in proper position on the fuselage. Add the rear hook at this time. The prong projects through the side of the fuselage so that it is not necessary to poke around inside the fuselage in trying to find the hook when installing a new rubber motor.
Covering
Cover the model using small pieces of tissue for the sharply curved portions of the fuselage. It is a good idea to cover one longitudinal segment between two stringers at a time. White tissue can be used for lightness, or the proper colors for a navy ship can be used, that is all silver except the top of the wing which is yellow.
Landing Gear
The test model is shown with a duplication of the old Brewster style landing gear. The production model of the real ship has a much simpler arrangement, consisting of a single strut from the fuselage and the heavy fairing over additional struts running up to the wing. Make the inner strut as shown on the plan, from a single piece of .028 wire cemented to bulkhead B as shown. Slip a piece of 1/16" aluminum tubing over the wire then bend the axle and add the wheel. Cut the outer fairing from thin cardboard (a penny postcard will do) and cement it in place. Balsa may be used, but the cardboard allows the gear to move up and down freely to absorb landing shocks.
Propeller
Carve a propeller from a block of medium hard balsa 4-1/2" x 7/16" x 1-3/16", or use any low pitched prop of about that size that you have on hand.
Flying
Add as much detail as desired; cover the cockpit with thin celluloid and the ship is ready to fly. Use two strands of 1/8" flat rubber with about an inch of slack. If the model is slightly nose-heavy; bend up the trailing edge of the stabilizer. If it is very nose-heavy, remove the cowl and hollow it out until the model balances at about the wing midpoint. If the model stalls, bend the trailing edge of the stabilizer down. Correct for spiral diving by applying opposite rudder. If necessary, warp the trailing edge of the inside wing down.
Our test model proved very fast and covered a great deal of ground in an average twenty second flight. The model is very rugged and can be flown outdoors with great success.
Scanned From
Flying Scale Models
Air Age Publications
Copyright 1944
![]()
[ Home ] [ Previous Plan Pages ] [ Special
Things ] [ Earl Stahl Plans ]