How to Construct the Winner of the 1941
Nationals Open Division Event Which Flew
for 1002 Seconds on Three Official Flights
By ED LAMB
|
|
|
|
The Plan Page
[ Home ] [ Previous Plan Pages ]
[ Special Things ] [ Earl Stahl Plans ]
How to Construct the Winner of the 1941
Nationals Open Division Event Which Flew
for 1002 Seconds on Three Official Flights
By ED LAMB
|
|
|
|
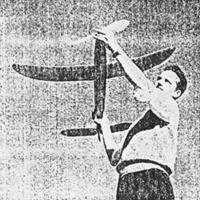
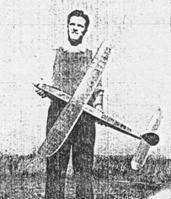
THE "Climber" was completed at 4 o'clock the morning of the 1941 Nationals at Chicago; however, it is far from being a ship that was "thrown together in a hurry." About a month before the Nationals plans were drawn up for the model and before my brother and I arrived in Chicago, the wing, tail section and propeller were completed; the fuselage was built the two nights previous to the contest. We believe that this model's outstanding feature is its tremendous climbing ability. At the Nationals it had one flight of over seven minutes and another of over eight minutes, before going out of sight of the timer's stand. On both of these flights it landed about ten miles from the field. The total for the three official flights was 1002 seconds. In evening flying the plane has been averaging over three minutes a flight.
Construction
The fuselage is constructed of 1/8" hard balsa: the easiest method is to construct the two side sections first. Cut the longeron strips to right length and pin them on a board to the right shape, then cement in the crossections as shown on the plans. After both sides are completed and identical, cement in the top and bottom crossections, starting at the middle and working toward both ends. After all the crossections for top and bottom have been inserted, glue in the braces and 1/8" sheets as shown. The tail section is detachable and should he constructed separately.
The wing has an area of 200 square inches and is built in the usual manner. The three center sections are made in one piece and the two wing tips made separately. After the center section ribs have been cut and sanded to the same size, place them in position using the leading edge of 1/8" square balsa and the trailing edge of 1/8" x 3/8" balsa as supports. Glue them in firmly and then cement the top spars (1/16" x 3/32") and bottom spars (1/16" x 1/8") in position. After the spars are firmly cemented, cut the sections apart as shown on the plans and recement them at the proper dihedral angle.
The wing tips are constructed in a similar manner except that reed is used to round the wing ends. If the reed does not bend easily, soak in warm water for a few minutes. After the tip sections are completed cement them to the other sections at the right polyhedral angle. The tips should be 5-1/4" above the level of the center section. To give added strength to the wing glue in gusset along the trailing edge as shown.
The stabilizer is constructed in a manner similar to the wing; we suggest making each half separately and then cementing them together at the right dihedral angle. The tips should each be 7/8" higher than the center of the stabilizer.
The rudder is constructed by first cutting the outline pieces from 1/8" flat balsa and cementing them in position. Then glue in the ribs making sure the camber is on the left side.
The ribs are also cut from 1/8" flat balsa. After they are firmly in position glue in the spars, which are 1/16" square balsa strips.
The propeller is carved from a medium-hard balsa block 16" x 2-1/4" x 1-7/8". Cut the block as shown on the plans and after both blades are cut down to the desired shape, saw out the center section, 1-3/8" long, replacing it with the same length piece of hard balsa. After the blades are cut apart check them to make sure both are identically the same weight and shape.
The flying success of your model will depend largely on the propeller so make sure that the pitch is the same for both blades. After the blades have been sanded smooth and hinged to the center section give them about six or eight coats of clear dope, sanding down with pumice between each coat.
The fuselage is covered with gas model Silkspan ; the wing, stabilizer and rudder with tissue. After the parts are papered, water dope and then apply three coats of clear dope.
Flying
If the plans for the model have been followed closely you should have little trouble in adjusting the plane for flying. First test the position of the wing by gliding. If the plane dips, move the wing back slightly; if the glide is too steep, move the wing forward. After a satisfactory glide has been obtained give the motor about 100 turns to test the climb. It may be necessary to insert either side or down thrust to get the proper climb and turn under power. The plane should climb and glide to the right and in adjusting the circle try not to have it glide in circles of over 250 feet in diameter, as a plane turning in a small circle will stay in sight longer.
If the instructions have been followed carefully and care has been taken in building the "Climber" it should be a consistent contest winner for you. Good luck!
![]()
![]()
![]()
Scanned From December 1941
Model Airplane News
[ Home ] [ Previous Plan Pages ] [ Special
Things ] [ Earl Stahl Plans ]