|
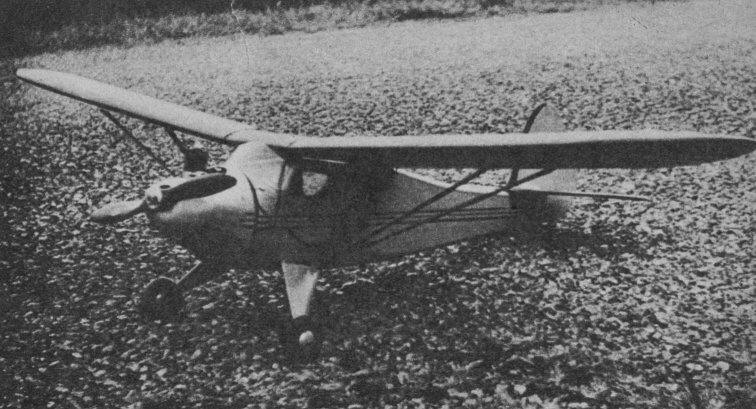
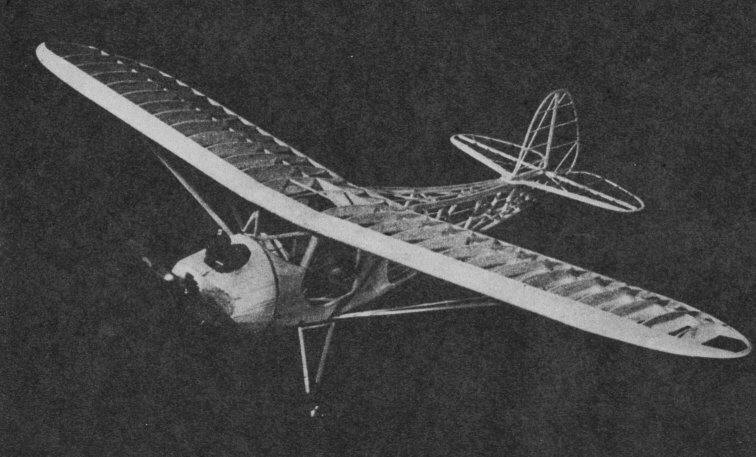
Monocoupe Tired of contest models? Get away from it all with this swell flying scale version of the latest Monocoupe. Its appearance will satisfy even most exacting scale fiend.
LAST year the Monocoupe Airplane & Engine Corp. moved its factory from Robertson, Missouri, to Orlando, Florida. In keeping with the fine line of aircraft manufactured in the past, a new member has been recently added to the family -- the model 90 AF. This new model is powered with the Franklin 90 h.p. flat opposed engine. Electric starter and generator is standard equipment. The interior of the cabin has been cleaned up to a point where the appearance is that of a new car. No push-rods to get in the way. All are buried under the floor hoards. The cowlings have all been refined, resulting in cleaner lines and greatly increased visibility for both the pilot and passenger. As is shown in the photographs, this model is not the usual type of flying scale model where all except the general outlines are scattered to the four winds. For general sport, exhibition or precision flying; a good scale model is hard to beat. To date, this one has had over sixty flights with a total damage of two props and the fairing cracked off the landing gear. The ship is built to a scale of one and one half inches to the foot. The only deviation from scale is the slight enlargement of the tail group, increase in wing dihedral, and removable wings and tail. From the, firewall to the tail post the fuselage has all the members that the large ship has. Well, fellas, open that can of glue and start in. Make the two sides of the fuselage first, the top from T-3 to the tail post, the bottom from B-1 to the tail post. At the junctions B-2 and at T-2 and at B-5 only a tack cement joint is made. This is because when the two sides are assembled with the cross members these points are spread beyond the normal widths of the longerons. In assembling the two sides the tail post is fastened together and spreader pieces at stations T-3 and B-3 are installed first. Work from here to the tail post. Put in cross members at B-1. The vertical members come to a point at T-1. The top windshield members from T-1 to T-3 are added at this time. Note: The top longerons are straight from T-3 to T.5. Be sure that station T-1, B-1 is perpendicular to this top line. The top and bottom diagonal members are added checking the alignment as they are installed. The landing gear is on 1/16" music wire and is bound to the cross members and longerons at B-3 and B-4. A medium-sized thrust bearing is bound and soldered to the rear landing gear strut 1/4" from the longerons. This is the lower attachment for the wing struts. The fuselage fairing is next. Cement the firewall FF to the members at station B-1, T-1. The door frame is made of four pieces of 1/32 x 1/8" balsa strips. These are cemented together and while wet, bend to outline shape and let dry. It is best to fasten these in place right on the fuselage sides. The top and back sides of the door frames are of 3/32 x ?/8" balsa. The top continues back to T-5. The door is made the same way right in the door frame. The instrument panel is installed and the lower windshield outline is cemented in place. This outline is of 1/16" diameter bamboo. A short curved bamboo brace from the outline to the instrument panel is added one inch on each side of the center line of the fuselage. Short stringers are installed on the sides from the firewall to the door frames. The stringers on the sides of the fuselage are of 1/16 x 3/16". A 1/8" square stringer is added to the lower side below the door from the firewall to B-7. The window outline (rear) is of 1/16" sheet. Two stringers are installed on the top equally spaced from station T-5 to one half inch ahead of T-8. Location of the bottom stringers shown on the former FF-1. The side stringers shown on this former join the lower side stringers at B-7. The longerons are faired as shown in the drawing. Top from T-5 to T-8 and the bottom B-7 to the tail post. 1/16" square stringers are cemented to the longerons and 1/64" sheet is bent over the longerons. See cross-section of longeron detail in the drawing. Cover the front part of the fuselage with 1/32" sheet. The tail. skid is two pieces of 1/16 x 3/16" bamboo. It fits on top of the cross brace at station B-11 and in a slot at the bottom of the tail post. The stabilizer mount platform is of 1/16" plywood. Use plenty of cement. The landing gear is faired as indicated in the drawing. Front fairing 3/16" square balsa. Rear fairing 3/16 x 3/8" balsa. A top rib is of 1/8" sheet. Bottom also 1/8" sheet. The motor mount is a set. of standard aluminum mounts. Bolt to the firewall. The motor is set at minus one degree. No side offset is used. The motor cowling is built around the motor. Space the ring C-2 1/8" from the firewall. Use spacers and cement in place in a manner that can be cut loose later. Mount the motor. Carve the front block to shape and fasten to former C-2 with the 1/8 x 1/4" side spacers and the 1/8" sheet former on the bottom. Plank the cowling with 3/32 x 3/8" balsa. Be sure to leave an opening around the cylinder of the motor large enough to slide the cowl up and over the motor when removing or putting the cowl on. The cowling is held in place with four cowl clips, as shown in the drawing. The tail planes are of the usual construction except the outline which is made of laminated strips in the same manner as described in the building of the door frames. The fin-rudder assembly is cemented to the stabilizer-elevator assembly. The fin is offset 1/16" as shown in the drawing. The wing construction is standard practice. The wing section is the Clark-Y. Rib spacing is to scale. Thirty ribs are required from 1/32" sheet. The leading edge is 1/4" square. Front spar 1/8 x 5/8" and the rear spar 1/8 x 1/2". The trailing edge is 3/16 x 1/2". The wing tips are laminated. Six plys of 1/32 x 1/4" balsa. The spars are spliced and the dihedral built in before the wing is assembled. A reinforcing piece is added to the spars at the splice. This reinforcement piece is of 1/32" birch plywood. Use plenty of cement and bind with thread. Assemble the center section first. Then the outboard panels, first one side then the other. The tip ribs are standard ribs clipped. These are shaped after the tips are installed. Cover the leading edge top and bottom with 1/32" sheet. All ribs are capped with 1/32 x 3/32" balsa top and bottom. The struts are "tailor made." Mount the wing on the model and build the struts to fit. Cover the entire model. The original was covered with silk but with present conditions, the silk supply. may be --? So Silkspan or bamboo paper are the next best thing. The original model was painted in the same manner as the large ship. Loning Yellow with Fokker Red trim. Berryloid pigment dope was used. Three coats of clear dope. One silver priming coat. Sand slightly at this point. Six spray coats of Loning Yellow. Mask off all lettering and strips and give these portions of the model three coats of Fokker Red (over the yellow). When. dry, remove the tape. Water-sand with #400 wet or dry sandpaper, finishing with a good grade of rubbing compound. Install windshield and windows at this point. Install coil, battery box and timer in positions so as to balance the model approximately three and one half inches from the leading edge of the wing. Glide the model several times over tall grass and check the balance. Make any adjustments by adding weight to the nose or the tail as the case may be. The original model weighed twenty-four ounces with an Ohlsson "23" installed. The model has been flown with both an Ohlsson "23" and a Forster "29." Well, fellas, happy landings! BILL OF MATERIALS For Flying scale model of Monocoupe 90 AF.
Scanned From October 1942
|
||||||||||||||||||||||||||||||||||||||||||||||||||||||||||||||||||||||||||||||||||||||||||||||||||||||||||||||||||||||||||||||||||||||||||||||||||||||