|
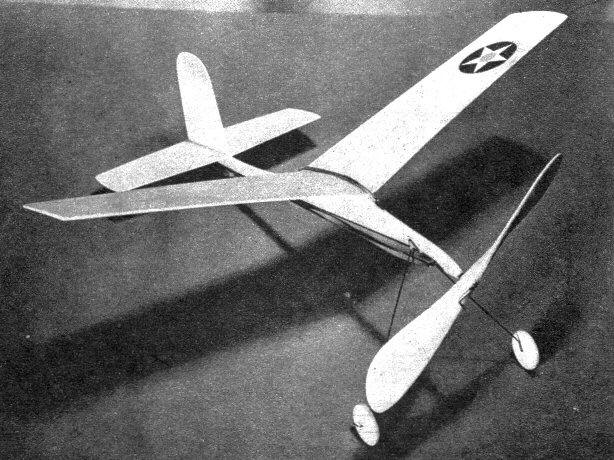
Cadet Here's the 1943 streamlined version of
the all-time-popular Baby r. o. g.
COVERING, more than any other phase of model building, stumps the beginner. So the smart thing to do, in order to build a simple flying model, is to make it of sheet balsa. Later, after becoming more adept through the construction of sheet models and more confident after seeing them fly, you can successfully tackle a built-up model. The selection of proper weight balsa of even texture largely determines the performance of sheet-balsa models. Carefully pick out straight-grained wood of soft, light weight for the wing and tail group; medium weight for the propeller block, and hard for the fuselage. Begin actual construction by tracing the fuselage outline on the 1/8" sheet balsa. Trim and sand the fuselage to shape, rounding the edges except where the wing and tail are to be attached. Trace wing formers, wing and tail group from 1/16" sheet. With a sandpaper block, taper the wing halves and tail group toward the tips by sanding them on a smooth surface. With very fine sandpaper, round off the edges. Mark the propeller block, cut along the diagonal lines, and also taper the back of the block slightly as indicated. With a sharp knife, carve the back or under surfaces of the blades with a slight amount of under camber. Carve the front of the blades, checking them against each other for thickness and shape. Round off the tips and sandpaper the entire propeller. Apply a coat of dope and sand lightly again. Balance it on the edge of your knife and add additional dope to the lighter blade. Bend the wire landing gear, attaching the wheels before bending up the axle ends. Also bend the wing attachment wire, propeller shaft, wing hooks, tail skid, rear hook, and the small wire for the free-wheeler. Cut proper lengths of 1/16" aluminum tubing for the thrust bearing, freewheeler, and the wing-attachment fitting. A large washer is used with the aluminum tube for the thrust bearing.
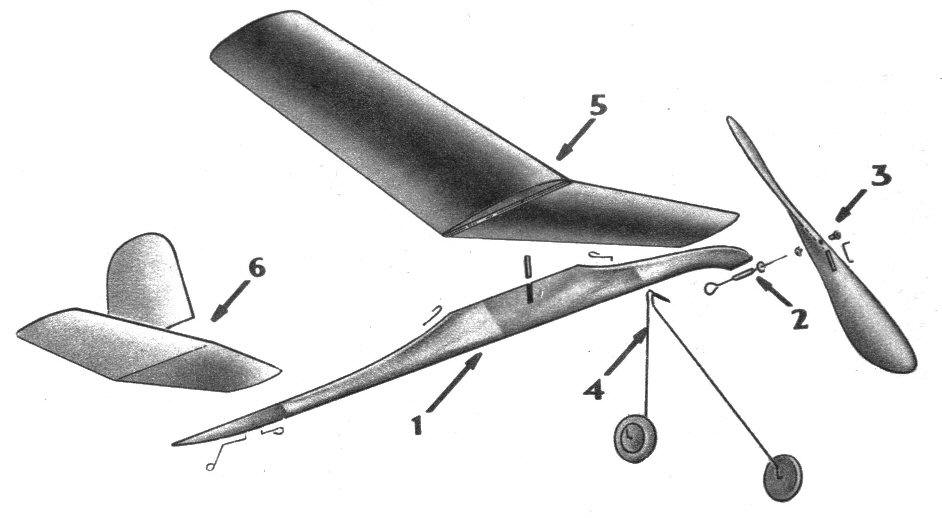
Assembly There are six steps in the assembly of this model. As shown on the sketch, they are: 1. Attach wire fittings and wing attachment tube to fuselage. 2. Assemble thrust bearing and propeller shaft. 3. Mount bearings for shaft in propeller and install free-wheeler. 4. Attach landing gear. 5. Cement wing formers in place, with aid of pins, and join wing halves. install wire fitting. 6. Cement rudder to stabilizer and cement entire tail group to the fuselage. Install four strands of 1/8" flat rubber with little or no slack. The rubber motor may be lubricated if desired. The model should balance even with the wing fitting. Bits of clay, stuck to nose or tail, may be used for final balancing. Check all surfaces for warps, then test-glide the model. When it is adjusted for smooth glides, wind the motor 100 turns and launch it into the wind. For maximum flights, put a little oil on the thrust bearing and wind the motor from the rear with a winder. Scanned From December 1942
|