|
AIR YOUTH GLIDER N0.3 By W. F. Tyler REALISM COMBINED WITH SIMPLE CONSTRUCTION-PLUS PERFORMANCE. MAKES THIS TOW-LINE GLIDER AN INTERESTING SUBJECT.
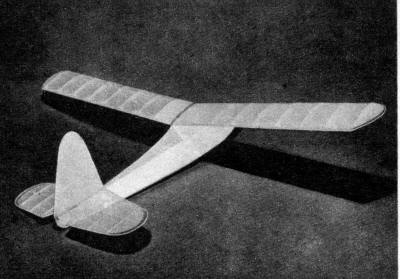
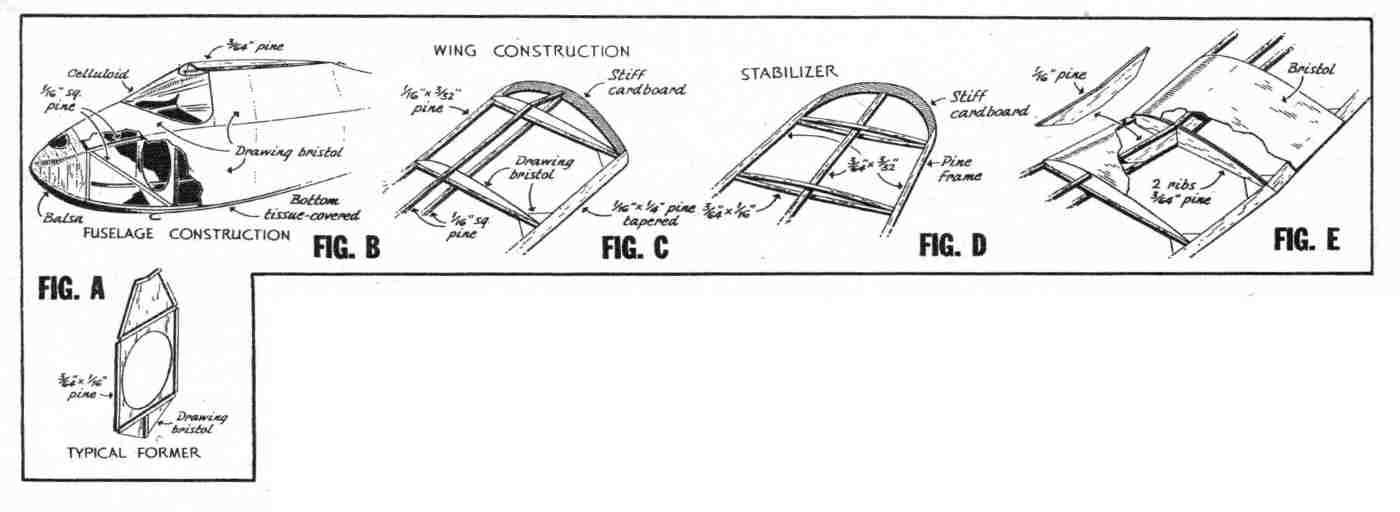
THE third and final design in this series of classroom projects bears a close resemblance both in appearance and construction to actual, full-size utility gliders. Two-ply Bristol board, stiff cardboard, assorted pine strips, a nose block of scrap pine or balsa, light model tissue, cement, dope and a paper clip for the simple wire fittings complete the list of required materials. Make a duplicate of the graphic scale as shown on the plans and use it to measure parts in order to redraw them full size. You'll find the graph paper background useful in duplicating wing tips. fuselage shape, et cetera. Begin by laying out the two fuselage sides on two-ply bristol board. Draw in the position of the formers and longerons. Cut these two sides out with scissors or razor blade and then cement in place the 1/16" square stringers and cross members. Now cut out the formers from bristol board as shown by Fig. A. Cement the two fuselage sides together at the rear, and when dry, add the formers. See Fig. B for details of nose and wing mount construction. Next, add the wing mount which is angled to correspond with the dihedral of the wing. If you have enlarged the Y and C forgers accurately, the construction will automatically come out correct. Cement in the top and bottom stringers and add Former X. Shape the nose block from scrap balsa (if available) or pine, and add to Former A. Note the hole in the top of the block. Cut the cockpit cover from sheet celluloid, or cellophane and glue in position. Cover the area from Former A to D on top of the fuselage with a fairly heavy grade of bond paper; fashion the simple wire fitting from a paper clip; cement in place, and the fuselage is finished except for covering -- which shouldn't be done until the entire model is completed. The wing and tail group are conventional, except that stiff cardboard has been substituted. for the usual wood tips and the wing ribs are of bristol board. This bristol board is used for all but the two end wing ribs and is reinforced by a strip of 1/16" square pine glued along the side; see Fig. C. Build the wings in two separate panels, then join together as shown by Sketch E. Use plenty of cement and block up one tip while drying to maintain the proper dihedral. Notice how the stabilizer ribs (see Fig. D) are cemented in pairs, one passing over and one under the center spar. The rudder is built flat. Although 3/64" x 3/32" pine strips are called for on the outlines, 1/16" x 1/8" strips may be substituted without affecting the performance of the finished model. Cover all parts with ordinary Silkspan tissue and spray lightly with water. When dry, apply a coat of thinned dope. Cement the tail group in place -- first the stabilizer, then the rudder -- checking carefully for alignment. The wing is held in place by a rubber band, as shown in the photographs. Before flying, try several test glides to see if the model is properly balanced. Very likely, you'll have to add weight to the nose until the center of gravity is approximately 1/3 the distance back from the front of the wing. Don't attempt tow-line flights until successful smooth hand-launched glides have been made. By slightly warping the rudder, the model can be made to circle, but don't overdo this adjustment, or tow launching the model will become difficult. For ordinary tow launching, use about seventy-five feet of strong thread, looped, of course, at one end; or attach a small 1/4"-diameter ring which can be fashioned from all ordinary common pin. The launching technique is very simple, but you will need a helper. Have him bold the model while you walk out with the line. When the end of the line has been reached, he releases the model and you run slowly backward, towing the model into the air in a manner very similar to the launching of a kite. Of course, the model should be launched into the wind. When it is overhead, slack off on the line which automatically drops off -- and the ship is on its own. Scanned From June 1943
|