|
SOUTHERN BELL TRY THIS SLEEK TOWLINE GLIDER FOR A
SURE-FIRE CONTEST WINNER. RUGGED CONSTRUCTION,
High wing loading and flat bottom airfoil give this model a fast gliding speed needed to hop from thermal to thermal for increased duration.
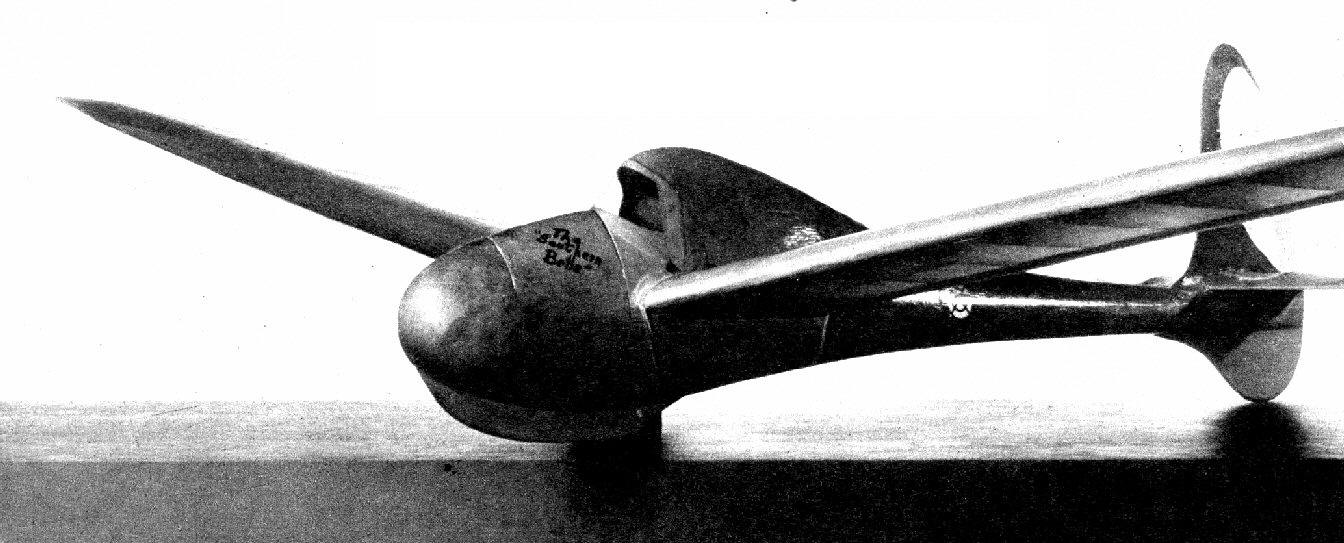
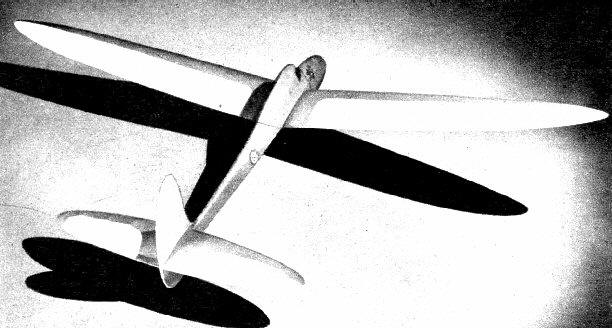
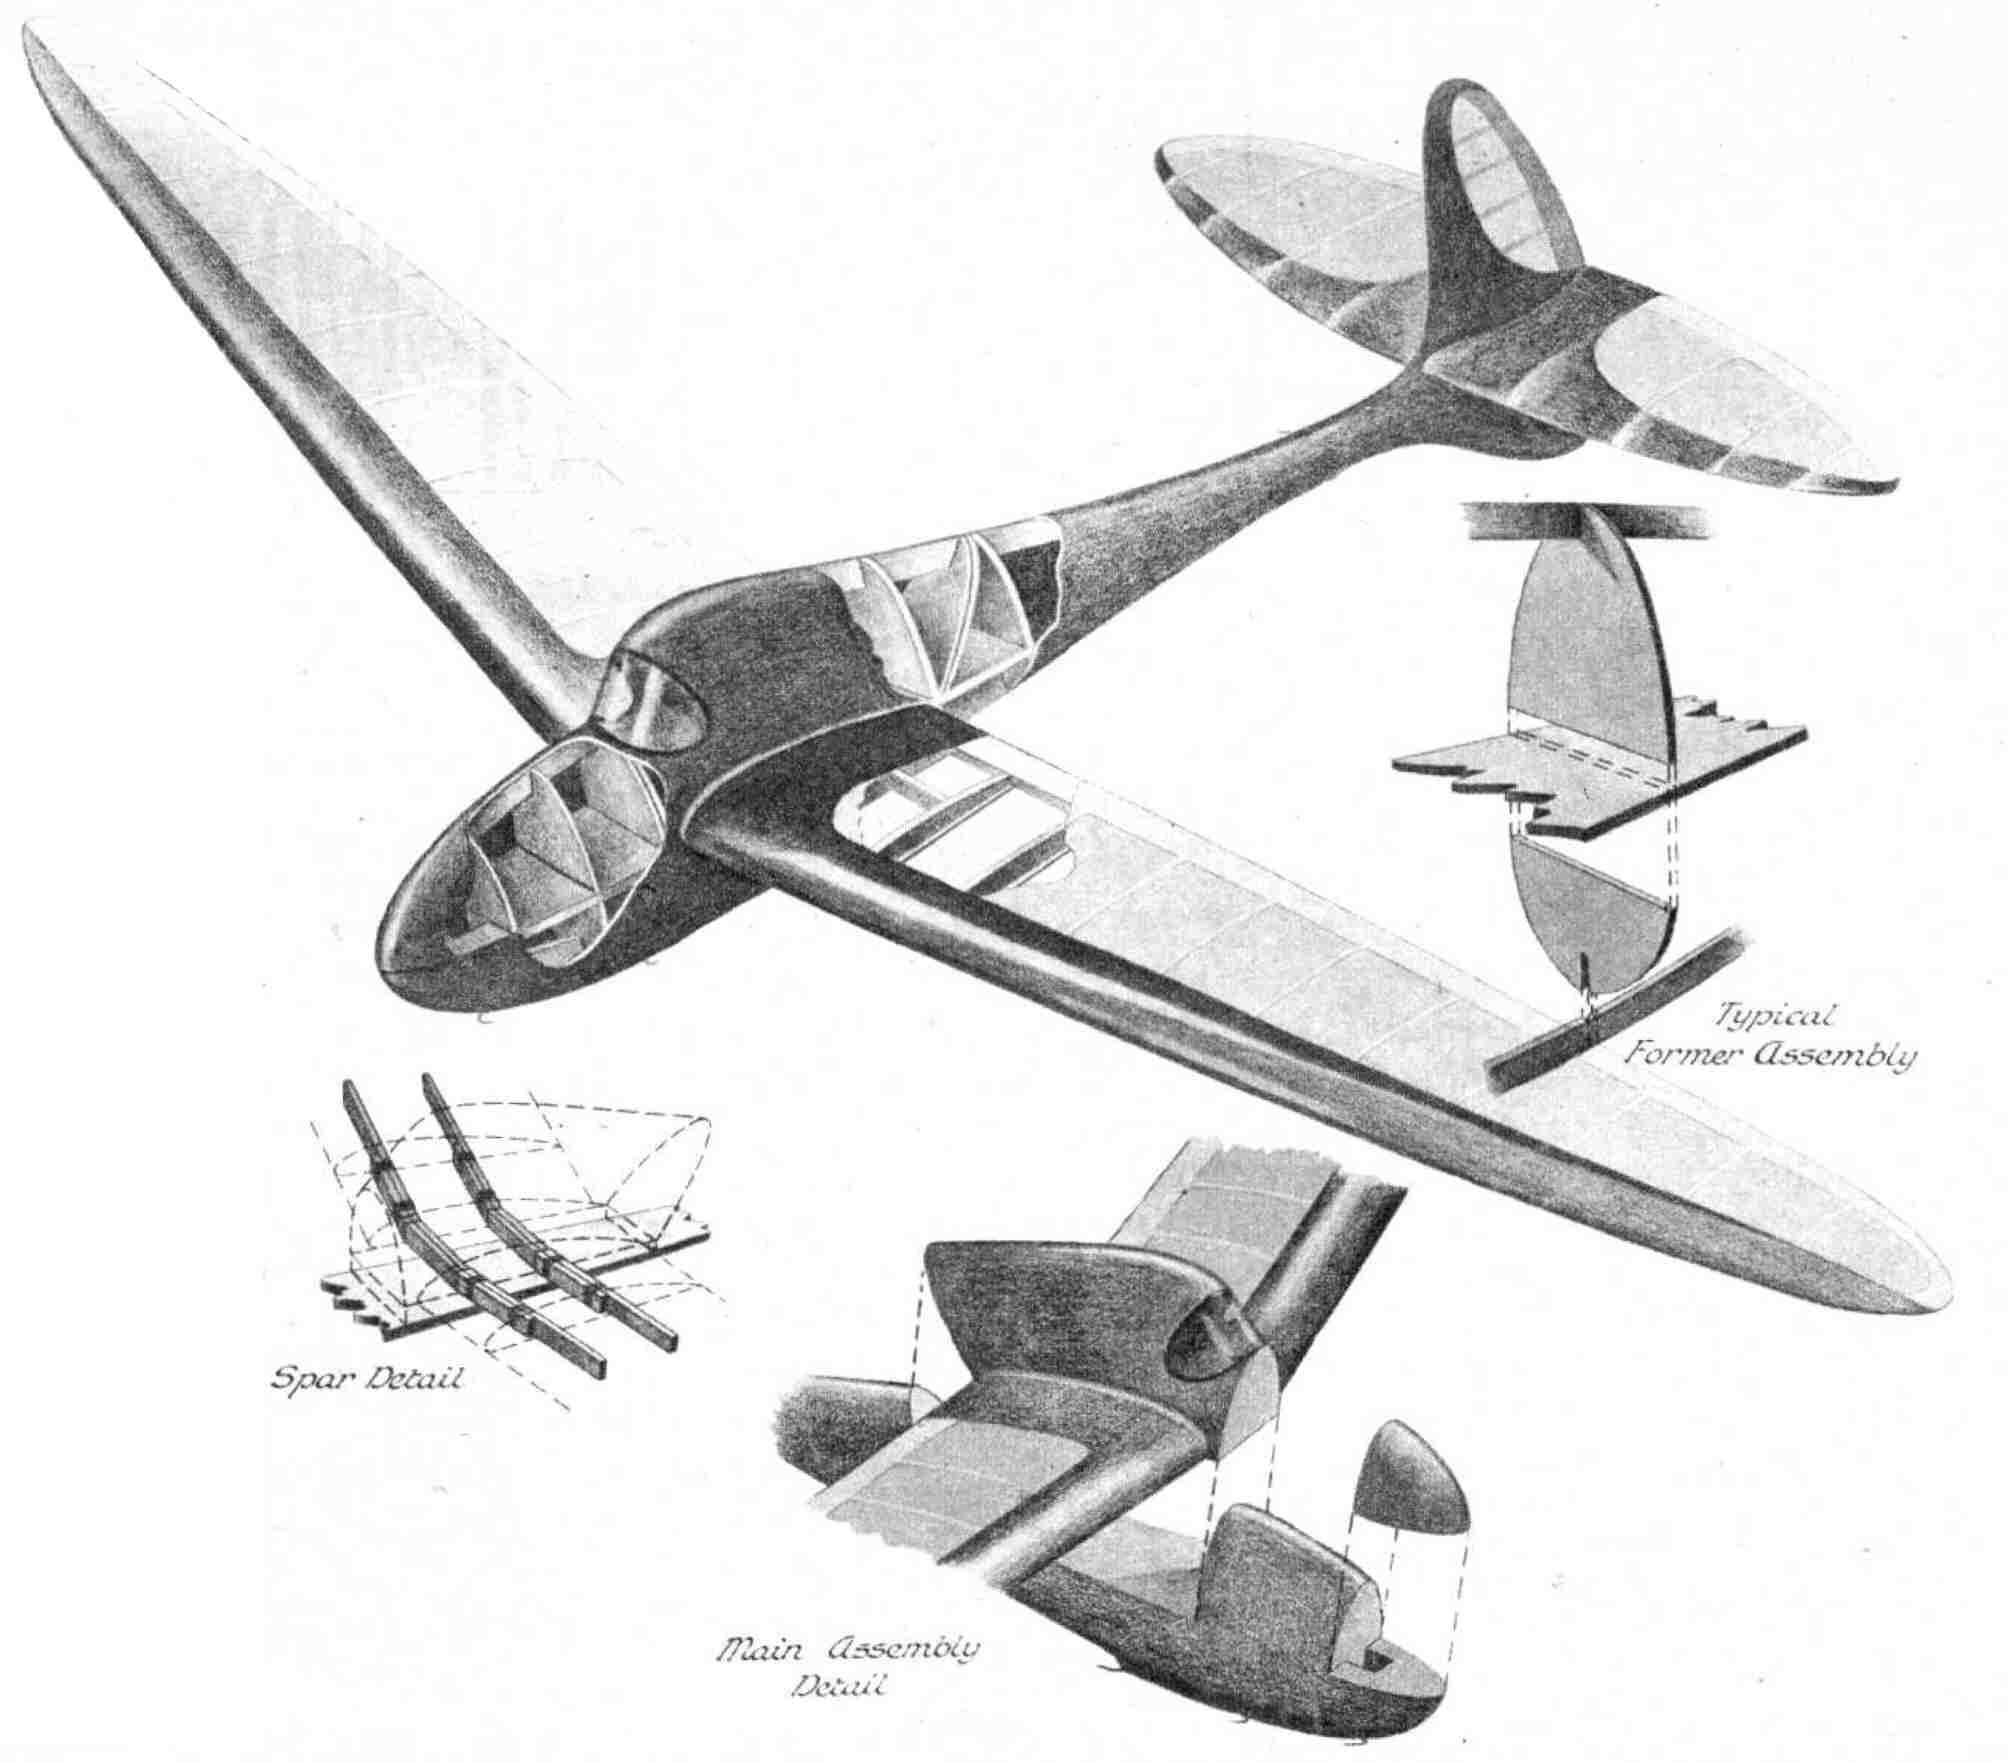
DUE to the increasing shortage of rubber and of gas motors many model builders have turned their talents to the construction of the long-neglected sailplane; and so has the author - with amazing results. His attempts have been quite justified, as you can see by glancing at the photographs and plans that accompany this article. If you are looking for a really "solid" towliner, then you need look no further. The model also fits all A. M. A. contest requirements. Construction: Construction is begun by enlarging the plans to full size; this can be done easily with a little time and patience. Use a sharp-pointed pencil to insure accuracy. The fuselage is built first. The floorboard is cut from 1/8" sheet balsa and is the main part of the body. The formers are cemented to the floor at right angles and then notched when dry. The keel outlines are cemented into the notches. The section over the wing is made removable for ease in transportation. The fuselage is now ready to he planked with very soft 1/8" strips. When this has been done, cement the noseblock in place; the latter is made of fairly hard balsa, as it takes the shock when landing. When dry, sand entire fuselage until the planking is about 1/16" thick. Then smooth flown with very fine sandpaper. A nice finish can he obtained by applying several coats of wood tiller with sandings between coats. The wing can be made next so that it call be fitted against the body's removable section. The trailing edge is made from 1/8" sheet and is pinned to the workboard. The wing ribs are cut from 1/16" sheet except the center rib which is medium hard 1/8". The brace spars are hard 1/8" by 1/2" and only extend so far as is shown on the drawing. The 1/16 sheet planking can now be cemented in place. Do not omit this for the strength of the wing lies here. Use several coats of cement where the ribs meet the 1/4"-square leading edge. Notches are cut into the fuselage where the auxiliary spars pass through. Use plenty of glue at this station. The wing spars and the spars that pass through the body are cemented together at an angle that will allow a tip rise of 4-3/4". The joint is then bound with thread. The tail can be easily made by following the instructions on the plans, Cover the surfaces with a good grade of tissue, using fairly thick dope. The tissue should be of a color that can be seen easily from the air or on the ground; it should be applied with the grain running; spanwise. Spray lightly with water and allow to dry. This will cause the fibers of the paper to compress and the covering will be taut. Use about three coats of clear dope on the surfaces with a slight sanding between coats. The fuselage should be doped in a color which contrasts with the wing and tail. The original was striped in a bright red with a yellow background. The windshield can be added now as well as the landing skid, which is made of pine or very hard balsa. The tow hooks are cemented to the skid. The stabilizer is cemented to the fuselage and the rudder and sub-rudder are cemented in place. Flying: Adjust for a long, smooth glide. Do not adjust for a nose-high glide but for a nose-low flight, so that it will not "mush'' in flight. Use No. 8 thread for the tow cord; ordinary kite string can also be used. A good launching technique can be had only with practice. The model should be towed into the wind and when it has reached its maximum altitude, walk slowly back toward the spot where you started and the tow cord will slip off the hook and the glider will begin its search for updrafts.
Scanned From 1943
|