|
DUAL PURPOSE H. L. GLIDER
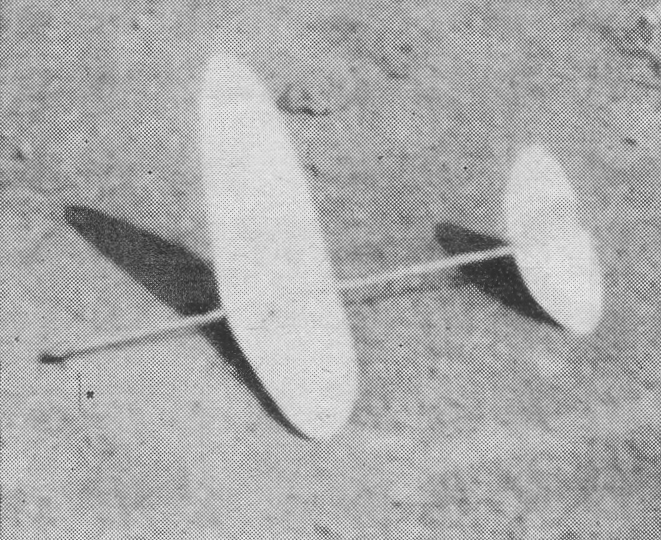
by HARRY JOHNSON How to build a high performance contest glider for indoor or outdoor flying THIS simple glider is designed for either indoor or outdoor flying. It is made very light because this improves floating ability, yet will be sufficiently strong if wood is carefully chosen and all joints well cemented. When properly built and adjusted this glider will give excellent performance. The original design has made many flights from seven to eighteen minutes, several having disappeared from sight. WING: Wing outline is the 2/3 ellipse design which is very efficient. Draw a full size plan of the wing on paper ruled with 1/4" squares. Then select a piece of 1/8" x 3" x 14" sheet balsa which is strong and very light; cut to the outline, and sand to the section shown beginning with No. 1 sandpaper and finishing with a very fine grade. Be very careful in sanding the wing, because the wood is easily dented and chipped. Trim the frayed edges off the sandpaper and work on a smooth surface. Next, dope the wing and sand with fine sandpaper between coats, repeating this until a smooth shiny surface is obtained. Cut the wing at the center and join carefully, raising each tip 2 -1/2". FUSELAGE: Select a piece of very hard straight-grained balsa 1/8" x 1/2" x 15-1/8"; sheet balsa is much better for fuselages than 3/16" or 1/4" because it is lighter and absorbs shocks more readily. Sand roughly to a tear-drop section and finish with very fine sandpaper. Dope and sand until the fuselage is very smooth. STABILIZER AND RUDDER: Make the stabilizer from a piece of very light sheet 1/16" x 2-1/8" x 6". Prepare the stabilizer and rudder in the same manner as the wing, sanding them to section shown in the plans. Use less dope on the tail surfaces, since too much is apt to warp them. ASSEMBLY: Attach the wing to the fuselage securely with three coats of cement covering approximately 3/4" on each side of the joint. With the trailing edge offset 1/32", cement the rudder on the stabilizer with two coats of cement, making certain the wing and stabilizer are parallel. Finally put two coats of thin cement on the leading edges and tips of the wing and stabilizer to prevent them being nicked. FLYING: Place enough clay on the nose until it balances about 2-1/4" from the leading edge, and make tests until a smooth left circle is obtained. A circling flight is essential for a soaring flight. Warp the rear of the stabilizer down to prevent stalling and remove clay to prevent diving. The rudder is warped to circle the glider. When the final adjustment is made the trailing edge of the right wing is warped down a little. Now throw it straight up. If it does not level off into a smooth left circle, adjust the glider for a smaller circle by warping the right wing more. The best time to adjust this glider is in calm weather. Do not fly this model on windy days, as it is very light and will not stand being knocked about. If you follow these instructions and plans very carefully you should have no trouble in duplicating the performance of this glider. Try your luck. VICTORY Scanned From August, 1943
|