|
COULD BE A FREE-FLIGHT JOB OR CONTROLLINER. THIS SEMI-SCALE CLASS B GASSIE HAS EYE-APPEAL, CONTEST-LIKE PERFORMANCE.
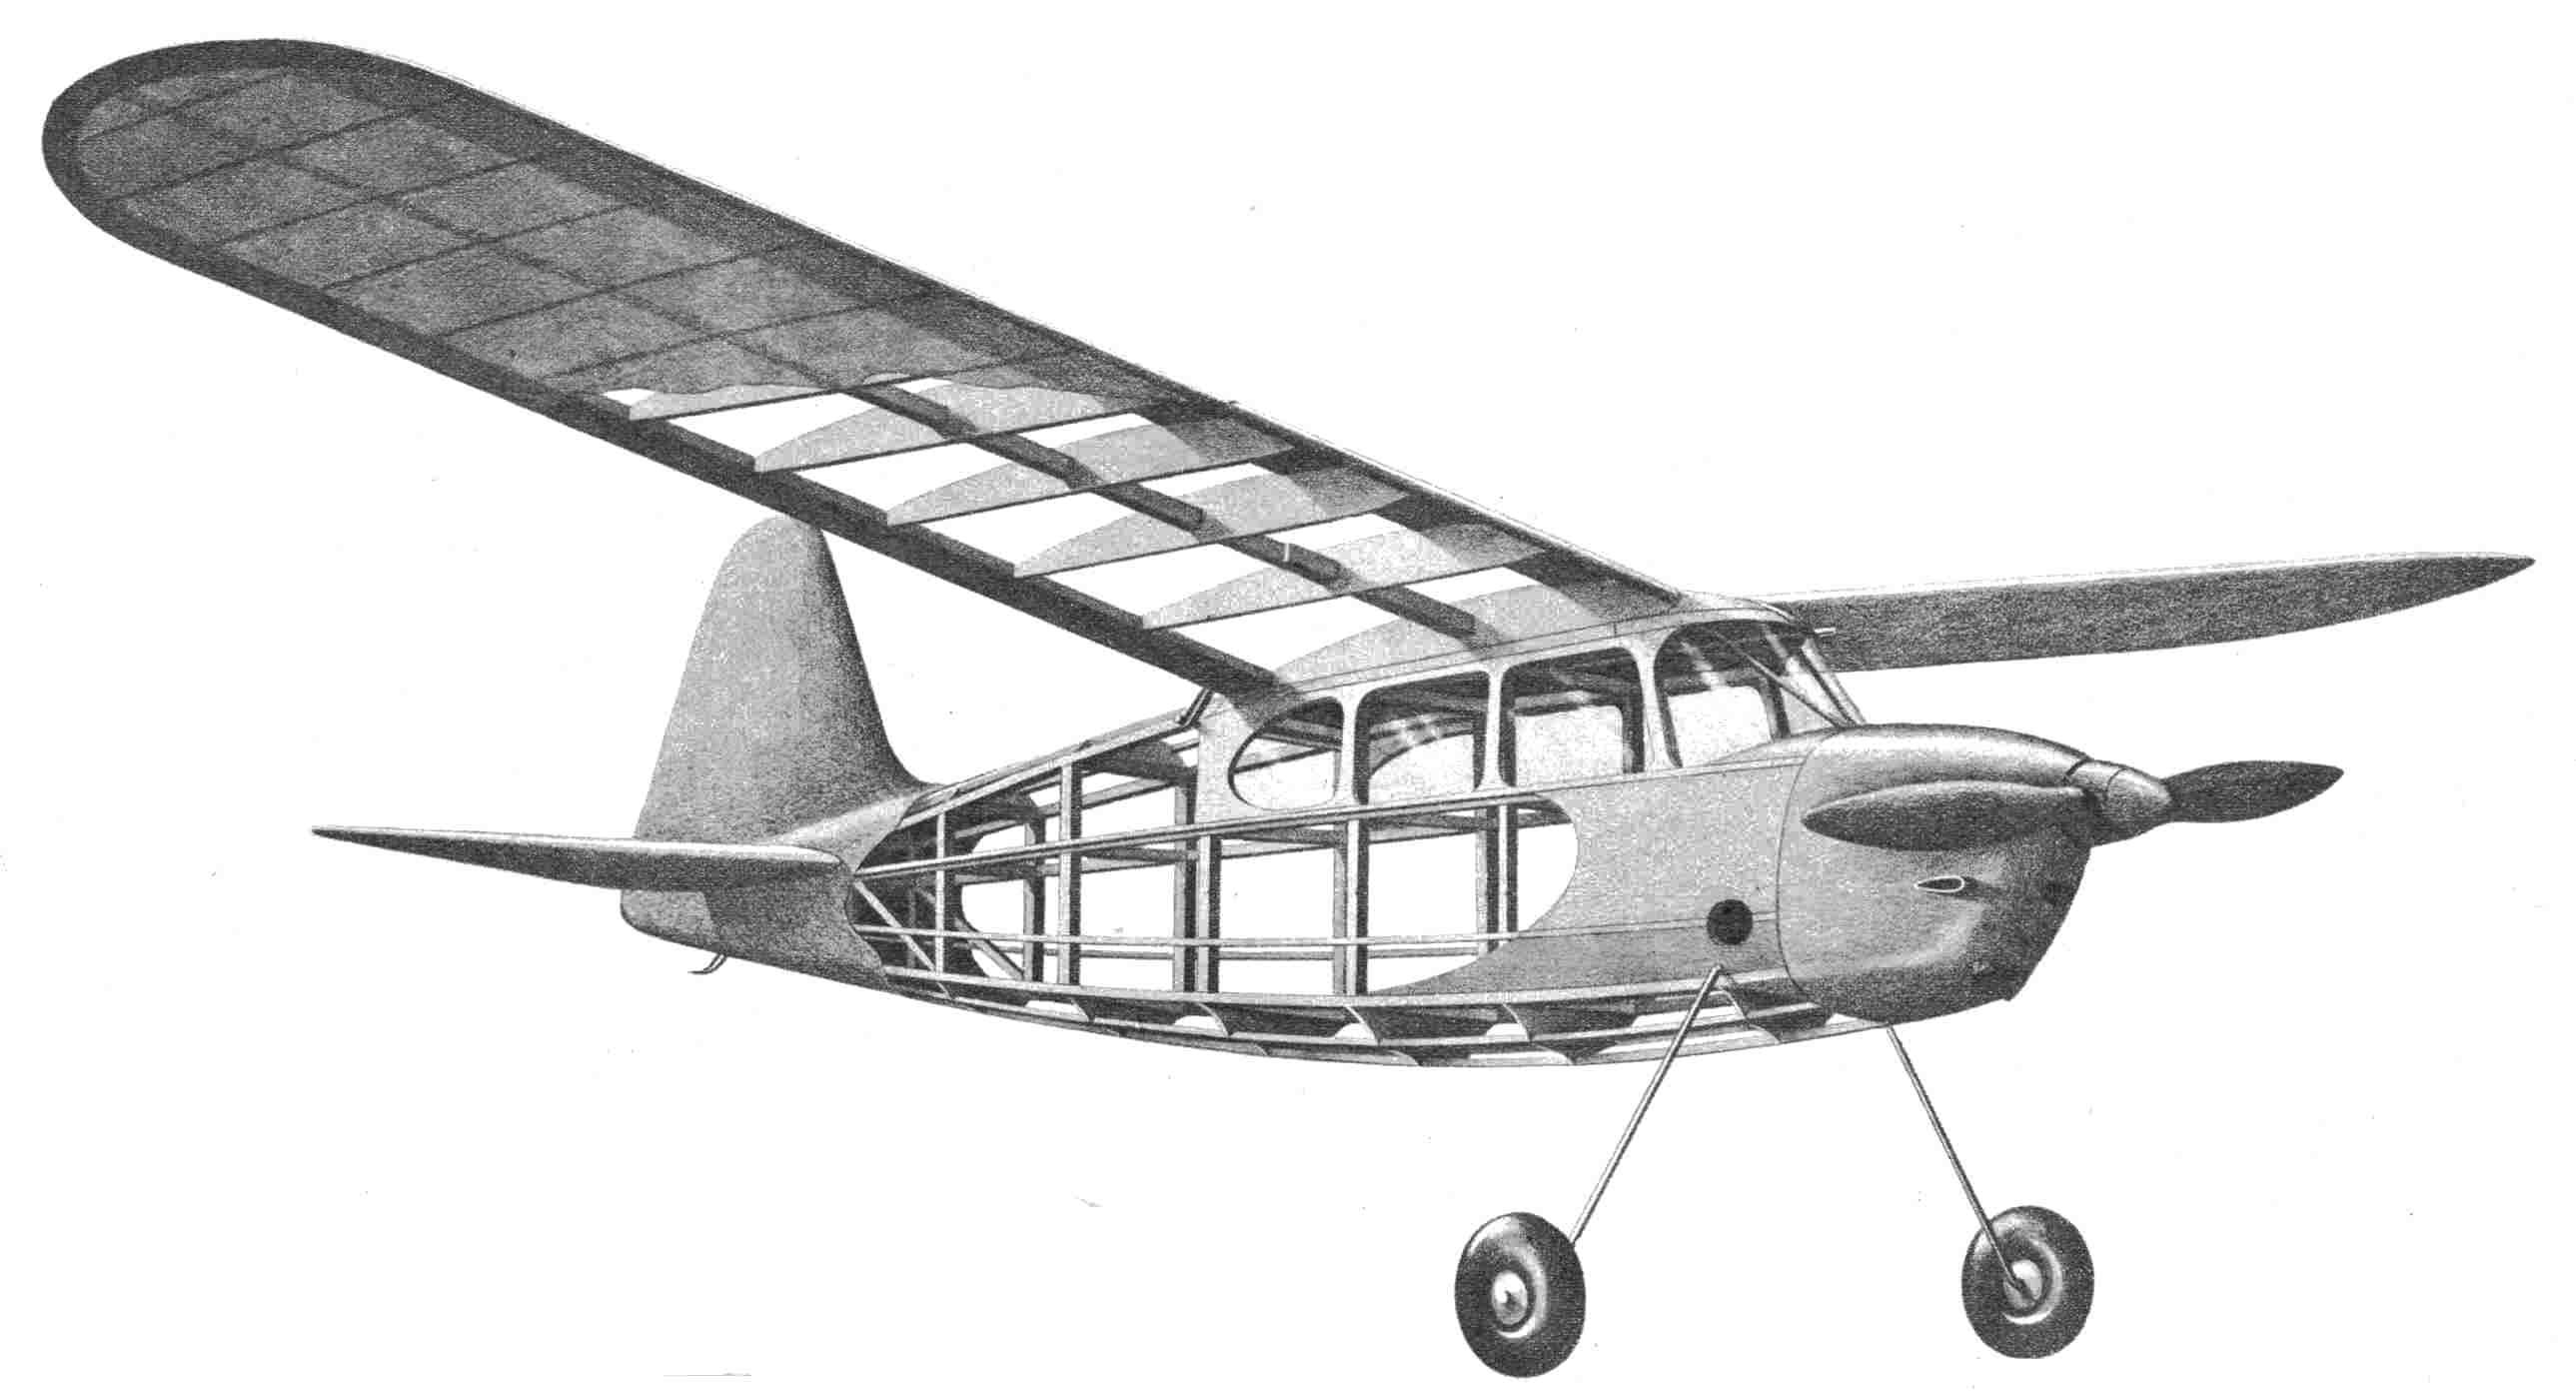
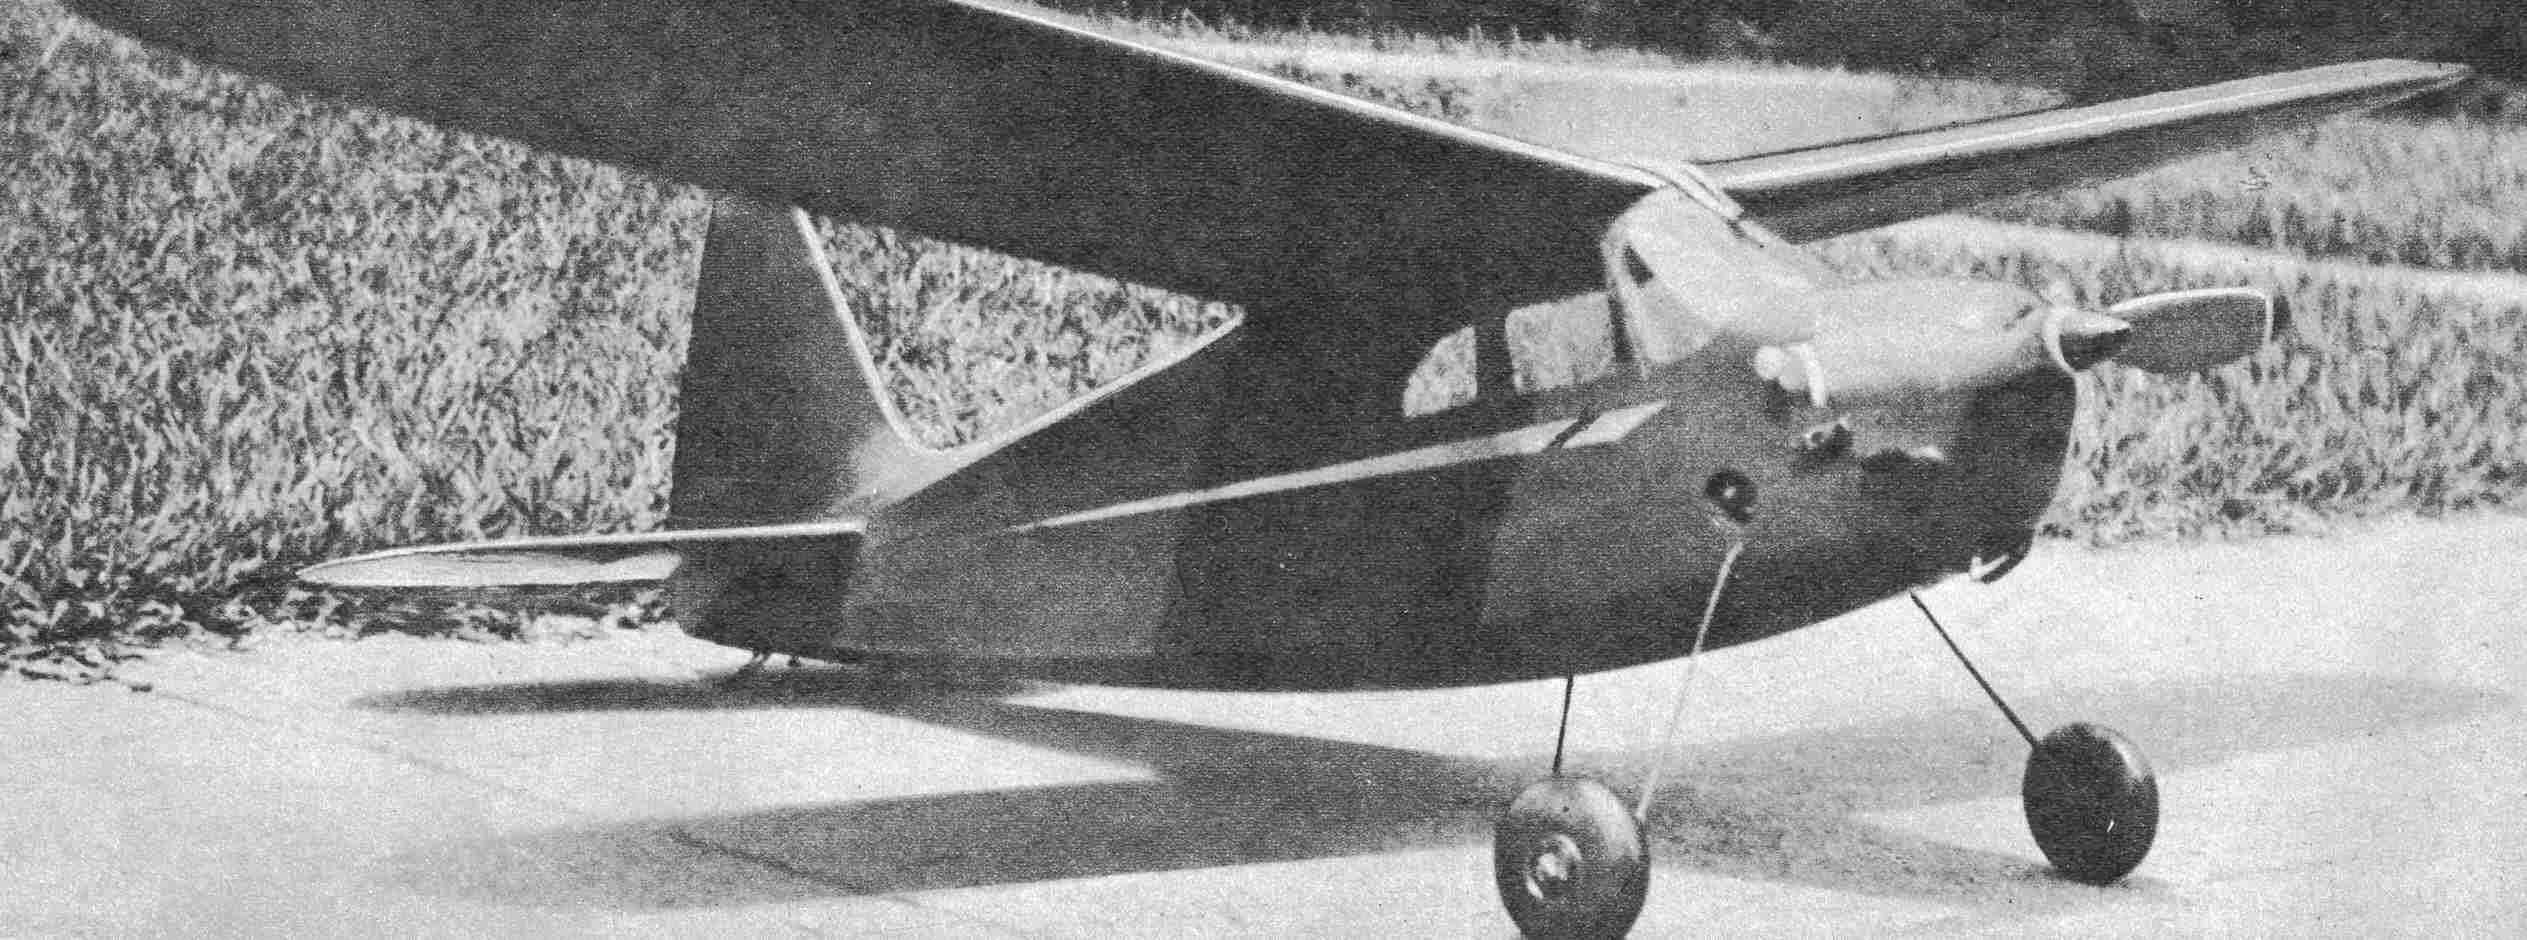
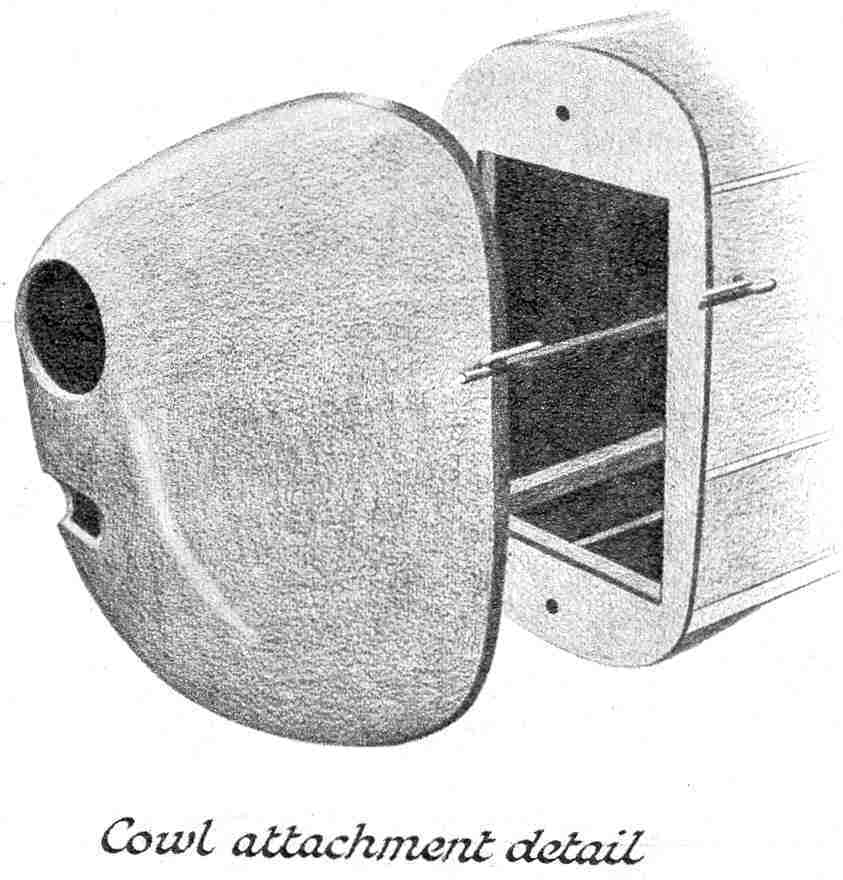
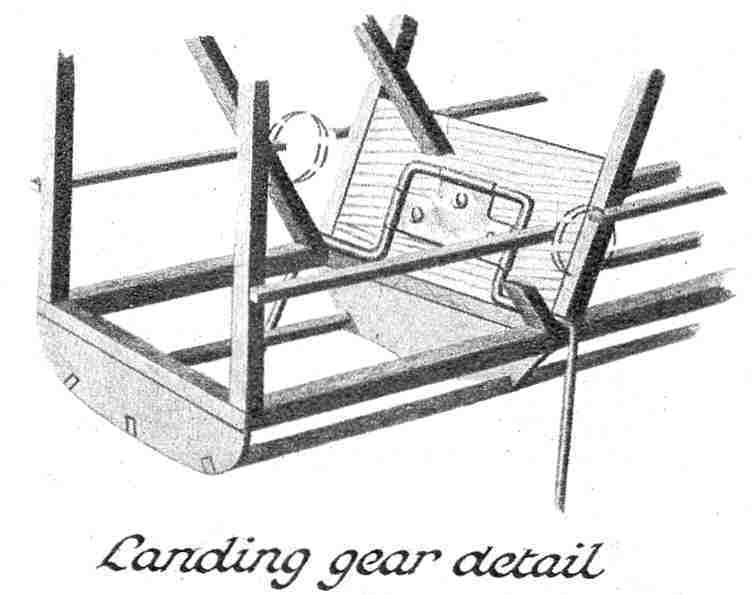
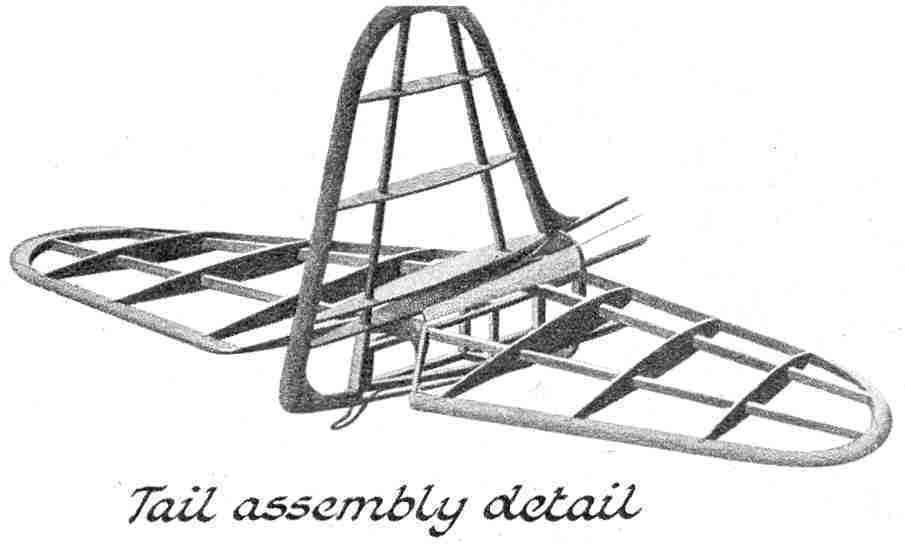
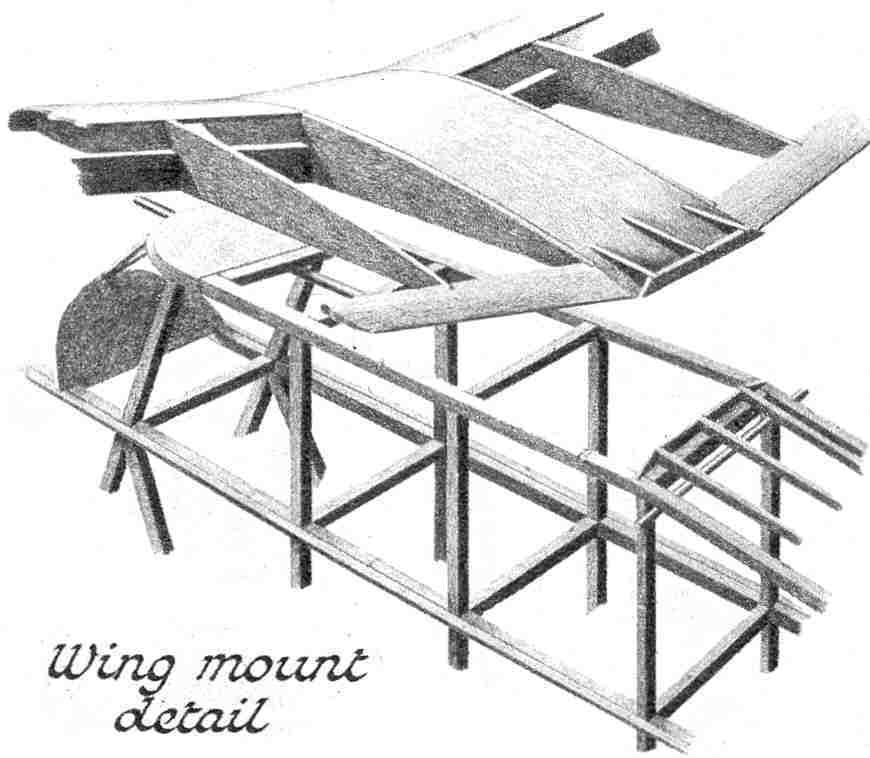
THIS model is extremely realistic, both in the air and on the ground, because of its smooth, even curves and graceful cowling. The basic design was adapted from the Rearwin Speedster, which has proved to be a good stable design for flying scale-models, but several changes were made to improve stability. The finished model weighed very close to twenty-five ounces and used a Class B motor, though a large class A, such as the Bantam or Ohlsson "19," could be substituted with satisfactory results. Due to the detachable motor unit, which will knock out if the model comes in too hard, we've never, to date, broken a single propeller. The inverted engine is almost completely cowled, and makes a very neat-appearing nose which at first glance seems to give the appearance of housing a high-powered in-line engine. If you like a realistic model that will give the gruesome pylon jobs a run for their money, why not give this ship a try. Remember, "Could Be" can be flown either free-flight or control-line, depending upon your choice. To convert your model for controlline flying, simply build in a control-line mechanism and reconstruct the stabilizer so that the area back of the main spar is movable. The plans are easily enlarged - just follow the information given on the drawing. The formers can be enlarged by constructing a rectangle of the required width and height and connecting the mid-point of the top or bottom, as the case may be, with the two opposite ends by a smooth, well rounded curve. The first stringer is always in the middle of the former. The other stringers can be located by drawing a line from the mid-point opposite the center stringer to a diagonal corner of the rectangle. The point where it crosses the curve of the former is the location of the stringer, which is 1/8" x 1/4". The fuselage is constructed in the conventional box method. Pin 3/16" square strip on the plan wherever designated, and glue in the uprights. While they are drying thoroughly, fill in, between stations one and two, with 3/16" sheet. This will help hold the shape of the sides when removed from the plan. Cross braces may now be glued in place. Form the landing gear and install it before stringers are added. The plywood piece which holds the landing gear bolts must fit tightly and be glued well. Now that the landing gear is installed, fill in between stations two and three with 3/16" sheet. Cut all the necessary fuselage formers from 1/16" sheet wood and glue the bottom ones in place. Add the stringers to both side and bottom. tapering the side stringers to proper size after they are dry. The stabilizer and main rudder spar must be added before the top stringers can be glued in place. The stabilizer and rudder are simply and easily constructed. The ribs are symmetric, non-lifting airfoils and, therefore, are easy to enlarge. In gluing the stabilizer to the fuselage, be very sure that it is at 0° incidence. If it is not, difficulties will arise in flying. The top body formers may now be glued in place and the center stringer added, leaving enough length in the rear to reach the main rudder spar. The rudder is built in much the same manner as the stabilizer. The main, or rear, spar is tapered from 1/8" x 3/8" to 1/8" square at the tip. The bottom of the rudder is tapered from a 3/8" square to 3/8" x 1/8" This is the only unusual part of the rudder. Leave the lower part of the leading edge square for the fillet. After the rudder frame is constructed, cut the top stringer to the required length and fit the rudder onto the fuselage. The other stringers may now be put in place. The space between the top of the stabilizer and the first stringers is filled in with 1/16" sheet balsa, and sanded smooth. Rib outlines of 1/16" sheet are glued against the fuselage, on the stabilizer, top and bottom. This furnishes a surface to which the covering may be fastened on the fuselage, giving a one-piece appearance. The 3/16" sheet rudder fillet is glued to the framework, and sanded, completing construction work on the tail. The 1/16" plywood cowling ring should be glued in place next. It is the same shape as the firewall. Cut out the center to coincide with the main construction of the nose. The firewall should be made at the same time as the cowling ring, to be sure they match. After the cowling ring has dried, the firewall is placed against it and held tightly while two holes are drilled through both for dowel pegs, which line up the fuselage and cowl. Now add such details as the 1/16" sheet covering in front of the windshield, the 3/32" dowel windshield braces, dowel for mounting the wings, the 5/8" diameter holes for priming the engine, the cowling attachment hooks on the nose, and the 1/16" steel wire tail skid which is bound on with thread and glued. The body and tail group is now ready for covering. Silkspan was used to cover the original model because of the ease with which wrinkles are avoided when this covering is applied damp. The stabilizer is covered in the usual manner, If care is taken, the rudder can be made to appear an integral part of the fuselage by doping the covering to the outline of the rudder, the fillet, and the lower part of the sheet-covered section above the stabilizer. Do not dope the paper to any of the ribs, not even the base rib. The covering must be stretched tightly, while wet, to prevent wrinkles at the fillet. The paper need only extend forward from the fillet approximately two inches. From this spot to the very back, the rudder is covered in one piece. In front of the fillet the paper is glued to the stringers outlining it. If any wrinkles result in the fillet, dope this section and, when dry, cut out the wrinkles and replace by a small patch. It is most probable that this small patch will never be noticed and the smooth fillet really improves the appearance of the model. Before covering the body make sure the formers are all sanded hollow enough to prevent touching the surface. Any place where the former touches the covering will show a hump. The body is covered in several strips in order to prevent wrinkles. The side is covered in two strips, the lower one running from the center-line stringer to the lower longeron. The upper section runs from the center-line stringer to the center stringer on top, thus covering half the top. The bottom is divided into two sections by the center stringer. Now cover the surface in front of the windshield, and the fuselage is ready for doping. Be sure to dope the inside of the cabin before putting on the celluloid windows - then no white wood will mar the model's appearance. Glue the windows in place, then paint their outlines. Now for the wiring and cowling. This will vary slightly with each modeler, depending on the motor he uses. The model was designed for a radially mounted motor; but the changes required for a lug mount would be few. The wiring is all mounted on a 1/4" x 1/2" hard balsa track which slips into a bracket glued within the body. The wiring is all within the body, including an Austin Midget Tinier which is pulled, by string, through a grommet in the fuselage side. Penlite batteries should be used. In order to operate the needle valve, a long spring attachment was soldered to the Ohlson 23 needle valve. It was the same as a "Jiffy Juster," and was just long enough to reach outside the balsa, fill in the nose. The wing is the most simple thing to construct on this model. The ribs are cut from 1/16" sheet and sanded well. The leading and trailing edges now must be shaped and sanded; also, the trailing edge must be notched to receive the ribs. Four inches from the end, the spar begins to taper from both top and bottom to 3/16". The wing tips are cut from 3/16" sheet and sanded well. Assemble the two wing halves on a flat surface and let them dry thoroughly. While they are drying, cut the 1/16" plywood dihedral brace and prepare it to join the wings. The center spar in this wing runs all the way to the center line before breaking. After the wings are formed, the bottom of the spar is trimmed flat and a small triangular piece is added on the top, making the spar 1/2" inch thick at the center. The leading and trailing edges of the center section are now added and the center rib glued in place. When this is dry the 1/32" sheet leading edge covering is added on top, and the center section is covered with 1/16" sheet on both top and bottom. The small fillets on the wing are easily made. Place some wax paper over the body where the wing mounts and then strap the wing in place with rubber hands. A strip of 1/16" sheet is now glued to the trailing edge and former 7-T. Now continue the stringers onto the wing. When covered, this makes a smooth blending of wing to fuselage. The front fillet is shaped from a block of 3/8" x 3/8" x 3", and glued to the leading edge of the wing. Sand the entire frame to eliminate glue points and roughness. The wing is easily covered because there is no undercamber to the airfoil. After the plane has been doped well it is really for the test hop, provided there are no warps drastic enough to cause trouble. The model flew right off the drawing board, so to speak, with a climb that was a great surprise. The model had a tight left spiral that was comparable to most contest models. The motor has never yet been opened up, and it does not need to be. This fourfoot model tipped the scale at exactly 24 ozs. with hardwood longerons, uprights, cross braces, and wing spar. The glide was expected to be extremely fast, but in reality it was slightly faster than the average contest model. For control-line flying, a model like this would please any builder with its looks and performance. Scanned From April, 1944
|